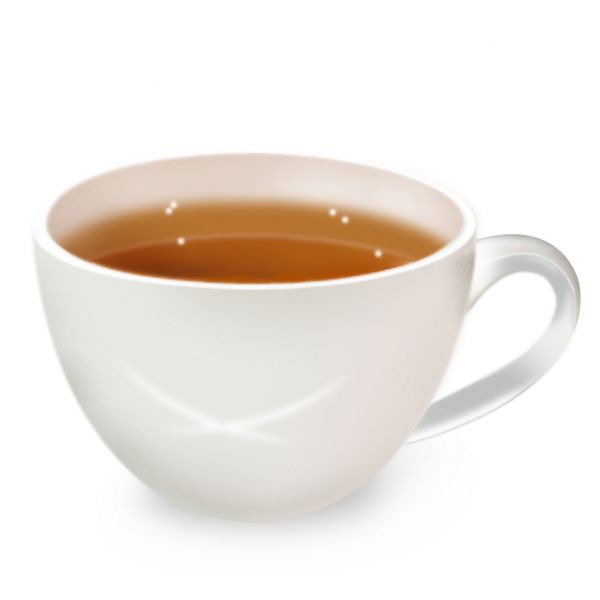
Create an Ultra-Realistic Tea Cup From Scratch
In this tutorial, I am going to design a realistic looking tea cup, filled with black tea.
I made it by only using very simple techniques in photoshop:
1. Basic shapes, Pen tool
2. Brushes, Burn/dodge tools
3. Gaussian blur.
We will be starting from scratch on a simple white canvas!
Let's go.
I made it by only using very simple techniques in photoshop:
1. Basic shapes, Pen tool
2. Brushes, Burn/dodge tools
3. Gaussian blur.
We will be starting from scratch on a simple white canvas!
Let's go.
End result:

Step 1
Start making the sketch of tea cup.
figure 1. Make an ellipse from the basic shapes.
figure 2. Copy the ellipse and move down.
figure 3. Use the pen tool to join the two ellipses.
figure 4. Draw the handle with pen tool.
(Making the sketch tip: After creating the paths, make pencil in selection and reduce the radius to 1 or 2 and right click >stroke path)

Step 2
Now we are going to color the sketch.
Feel free to use your own color combination to the cup.
Feel free to use your own color combination to the cup.

Step 3
We are going to make the top of the cup.
Make selection of the layer 'cup top' and transform it to W-96% and H-90%. In a new layer fill color and name the layer cup inside.
Make selection of the layer 'cup top' and transform it to W-96% and H-90%. In a new layer fill color and name the layer cup inside.

Step 4
Make a copy of the layer 'cup inside' and fill it with 'AD4D01'. Name the layer 'tea' and move down as shown in the figure.

Step 5
Still the 'tea' layer in selection, 'Ctrl+click' on the 'cup inside' layer.

Step 6
Press 'Ctrl+Shift+I' to inverse the selection and delete the tea out side of the cup.

Step 7
Let's have a look at the layer pallet. We should have our layers arranged like this.

Step 8
Now we are going to use brushes over the cup. Make new layer between cup side and cup top layers. Colorize as shown in the figure.
(If you use your own colors try to brush brighter at the center.)
(If you use your own colors try to brush brighter at the center.)

Step 9
Our light is coming from the left top.
Now we are going to shade the inside of the cup.
Select the 'cup inside' layer and pick the burn tool with soft edged brush and exposure around 20. Use burn tool over the left inside of the 'cup inside' layer, and use dodge tool with same opacity and brush pressure at the right inside of the same layer.

Step 10
Now we need to create a reflection in the inside of cup.
Create a new layer under 'tea' follow the step 4 (Same steps used for making the layer 'tea') and move down as in the figure . Fill it with 'B67431', name the layer 'tea reflection'.
Create a new layer under 'tea' follow the step 4 (Same steps used for making the layer 'tea') and move down as in the figure . Fill it with 'B67431', name the layer 'tea reflection'.

Step 11
Apply Gaussian blur with radius 15. ( you can reduce the opacity of the 'tea reflection' layer so that it will look more convincing)

Step 12
Still the 'tea reflection' layer in selection. 'Ctrl+ click' on the 'cup inside' layer and inverse the selection. (ctrl+shift+I) Delete the rest of the reflection that is out side of the cup.

Step 13
Copy the layer 'tea' (ctrl+j). Fill it with white color and apply Gaussian blur with a radius 6.

Step 14
Put the white filled layer under the 'tea' layer. Select the layer 'tea' and apply a Gaussian blur with radius 6.
Now move down the 'tea' layer a little that we can see a narrow edge of the white that is under the 'tea' layer.
Now merge the 'tea' layer with white filled layer and again ctrl+ click on the 'cup inside' layer. Select inverse and delete. Name layer 'tea'.
Now move down the 'tea' layer a little that we can see a narrow edge of the white that is under the 'tea' layer.
Now merge the 'tea' layer with white filled layer and again ctrl+ click on the 'cup inside' layer. Select inverse and delete. Name layer 'tea'.

Step 15
Take the burn tool with Exposure 20 and use it at the left side of the layer 'tea', as shown in the figure

Step 16
Make sure the foreground color is white.
In a new layer over the layer 'tea' use a soft edged brush with a very small radius ( opacity around 80-90). Start making some dots as in the figure. This will make our tea glowing.
In a new layer over the layer 'tea' use a soft edged brush with a very small radius ( opacity around 80-90). Start making some dots as in the figure. This will make our tea glowing.

Step 17
Select the 'cup top' layer and dodge with a soft edged brush and exposure 80. (check the figure)
Also paint the cup inside layer as shown in the figure.
Also paint the cup inside layer as shown in the figure.

Step 18
Fill color to the handle. And more shading on the 'cup side' layer. Link 'tea', 'tea reflection' and 'cup inside' layers and transform again (W-96%, take a look at the change in step 17 and 18).

Step 19
Use burn/ dodge tools to modify the handle as shown in the figure.

Step 20
Painted again at the cup side layer with a gray color.

Step 21
Take a soft edged brush, select the foreground color white, draw some reflection over the 'cup side' Layer, as shown in the figure.

Step 22
Use a low opacity soft brush again.
Change foreground color into gray (k-30).
Make a new layer under the teacup ( This should be the bottom layer) paint shadows, until you get convinced.
Change foreground color into gray (k-30).
Make a new layer under the teacup ( This should be the bottom layer) paint shadows, until you get convinced.
End.
Draw a surreal dragon

In this tutorial I will show you how you can draw a surreal dragon. I will guide you step by step on how to draw a nice looking dragon. For this drawing one of our staff members “Andreea” worked a few days until she realized this effect. For this surreal drawing we have used a Wacom Cintiq tablet. Such designs you can realize only with a Wacom Tablet and a lot of patience Preview full size image
I will start with a new document with the following size:

Then I will add a dark color over the document and with Brush Tool i will add some highlights. In that area i will create the sky.

I will create a new layer (press CTRL+SHIFT+ALT+N) and I will draw the sketch of the dragon. This step took me a few hours. First of all I have tried different combination on paper. I have scanned the image, and with my Graphic Tablet, I draw the dragon on my original document

I will create new layers and I will start drawing the scaly of this dragon


I will draw also some horns

Then I will add some scaly on the face of this dragon

I will create a new layer, and I will start drawing the background color of this dragon. On this layer I will change the opacity to 75 %, because I want to see the sketch


I will duplicate the layer (press CTRL+J) and I will add some light and some shadow with Burn Tool and Dodge Tool


I will find an image with some rocks and I will add the rocks under my dragon

I will use one more time the Burn Tool, and Dodge Tool to create some lights and shadows

I will create another layer and I will add with Brush Tool a background. I will use a dark blue color.

I want to create some flames. I will start with drawing on a new layer with Brush Tool. I will use a thin white brush

Then with 2 different orange colors I will make another drawing. Do not forget to make it on a new layer

I will create another layer and with a big smooth brush I will add more details to the flames

On the dragon I will add the reflection of the fire

Now I will try to accentuate the sketch of the dragon. This time I will use the Burn Tool, and Dodge Tool to create some shadows and lights


This is my result so far

With Dodge Tool and Burn Tool I will add some details over the scaly of this dragon

Now I will work on the dragon’s wings

I will add some thin lines with Burn Tool

The same thin lines I will add for the other wings

Behind the dragon I will draw some mountains


You can see my result so far

I will accentuate the eyes. With a small brush I will add some red colors in the dragon’s eyes

Behind the dragon I will add a big moon. I will not add more details behind the dragon. If you want to play with layers please apply for a VIP subscription and you can add as many details as you want

Now I will add a filter because I want to accentuate the image a little. It is very good if you will select all the layers, and make a copy of all of layers. You can merge these layers into a single one by pressing on CTRL+E
I will select this layer, and I will go to Filter > Sharpen > Smart Sharpen
This is the image before applying the filter

These are the settings for the Smart Sharpen filter

And this is my result

This is my result so far.
Preview full size image
I can modify the levels (CTRL+L) and the look of my drawing will be changed

Preview full size image

I hope you like my end result. If you want to play with the settings please apply for a VIP subscription and you will be able to download this layered PSD file
PSD size 200 MB
Resolution 2000 x 1800 pixels
Number of layers : 70
I will start with a new document with the following size:
Then I will add a dark color over the document and with Brush Tool i will add some highlights. In that area i will create the sky.
I will create a new layer (press CTRL+SHIFT+ALT+N) and I will draw the sketch of the dragon. This step took me a few hours. First of all I have tried different combination on paper. I have scanned the image, and with my Graphic Tablet, I draw the dragon on my original document
I will create new layers and I will start drawing the scaly of this dragon


I will draw also some horns
Then I will add some scaly on the face of this dragon

I will create a new layer, and I will start drawing the background color of this dragon. On this layer I will change the opacity to 75 %, because I want to see the sketch
I will duplicate the layer (press CTRL+J) and I will add some light and some shadow with Burn Tool and Dodge Tool
I will find an image with some rocks and I will add the rocks under my dragon
I will use one more time the Burn Tool, and Dodge Tool to create some lights and shadows
I will create another layer and I will add with Brush Tool a background. I will use a dark blue color.
I want to create some flames. I will start with drawing on a new layer with Brush Tool. I will use a thin white brush
Then with 2 different orange colors I will make another drawing. Do not forget to make it on a new layer
I will create another layer and with a big smooth brush I will add more details to the flames
On the dragon I will add the reflection of the fire
Now I will try to accentuate the sketch of the dragon. This time I will use the Burn Tool, and Dodge Tool to create some shadows and lights
This is my result so far
With Dodge Tool and Burn Tool I will add some details over the scaly of this dragon
Now I will work on the dragon’s wings
I will add some thin lines with Burn Tool
The same thin lines I will add for the other wings
Behind the dragon I will draw some mountains
You can see my result so far
I will accentuate the eyes. With a small brush I will add some red colors in the dragon’s eyes
Behind the dragon I will add a big moon. I will not add more details behind the dragon. If you want to play with layers please apply for a VIP subscription and you can add as many details as you want
Now I will add a filter because I want to accentuate the image a little. It is very good if you will select all the layers, and make a copy of all of layers. You can merge these layers into a single one by pressing on CTRL+E
I will select this layer, and I will go to Filter > Sharpen > Smart Sharpen
This is the image before applying the filter
These are the settings for the Smart Sharpen filter
And this is my result
This is my result so far.
Preview full size image
I can modify the levels (CTRL+L) and the look of my drawing will be changed
Preview full size image
I hope you like my end result. If you want to play with the settings please apply for a VIP subscription and you will be able to download this layered PSD file
PSD size 200 MB
Resolution 2000 x 1800 pixels
Number of layers : 70